Assembling Magnetic Controllers on Induction Heating Coil
Adhesive bonding (gluing) is the most common method of attaching Fluxtrol concentrators to an induction heating coil. The user must clearly understand the goals of bonding: whether it’s only to keep the controller on the coil or also to provide its intensive cooling by means of heat transfer to the water-cooled coil turns.
Mechanical connection is the most accurate and reliable method of attachment of controllers to induction heating coils. It can withstand thermal movements and vibration of the coil components during service.
There are many cases when Fluxtrol controllers may be attached not to the coil turns, but to structural components of induction installations such as chamber walls, frames of magnetic shields, etc.
Adhesive Bonding
Adhesive bonding (gluing) is the most common method of attaching Fluxtrol concentrators to an induction heating coil. The user must clearly understand the goals of bonding: whether it’s only to keep the controller on the coil or also to provide its intensive cooling by means of heat transfer to the water-cooled coil turns.
The second case is especially important for heavy loaded coils and long heating cycle such as in scanning applications. This case is more demanding and will be mainly described further. Different adhesives may be used for attachment with epoxy resins being the most commonly used glues.
Adhesive must have the following characteristics:
- High adhesion strength
- Good thermal conductivity
- High temperature resistance when the joint area is expected to be hot. Keep in mind that in high power applications some zones of the copper surface can reach 200 C or even more in spite of intensive water cooling of the coil.
If intensive cooling of the concentrator isn’t required, many other glues may be used: epoxies, silicone Adhesive or others. Silicone rubber is a very poor thermal conductor and it can be use only for lightly loaded inductor coils or when the magnetic controller has alternative cooling such as by quenching media after a short heating time.
Adhesive Selection
| Adhesive | Thermal Conductivity W/cmK | Max Service Temperature | Thermal Loading (Recommended) | Gap, mm |
| Epoxy 50-3100* | 0.022 | 205/400 | Heavy | 0.1-0.15 |
| Duralco 4525* | 0.02 | 260/500 | Heavy | 0.1-0.15 |
| Epoxy J-B Weld* | 0.01 | 230/450 | Common | 0.2-0.3 |
| Common Use Epoxies | <0.002 | >120/250 | Low | 0.2-0.3 |
| Silicone TRV SE9184
Dow Corning |
0.0084 | 260/500 | Medium/Low | 0.25-0.5 |
| Common Use Silicones | <0.002 | <260/500 | Low | 0.25-0.5 |
* Epoxy 50-3100, Duralco 4525, J-B Weld and TRV SE9184 are thermally conductive adhesives

Notes:
- Epoxy and silicone adhesives have good resistance to water, quenchants and chemical resistance.
- All adhesives with high thermal conductivity are filled with ceramic or metal powder. Select metal-filled materials if you expect cutting or machining of glued material.
- If epoxies with good thermal conductivity aren’t available, it is possible to use common two or single part epoxies filled with metallic (aluminum, copper or iron) powder. Resulting glue must be thin enough for applying a thin layer of glue to the copper and Fluxtrol surfaces.
Gluing Technique


Recommended gluing procedure:
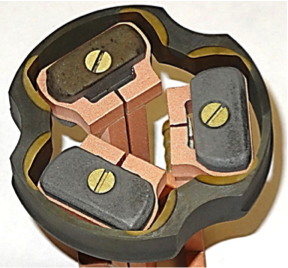
Two-turn pancake coil with concentrator glued with epoxy
- Clean all dirt, oils and greases using acetone or similar solvents
- Roughen the contact surfaces with course abrasive paper or file
- Apply thin layer of epoxy to both contact surfaces
- Assemble joint paying attention on complete filling the gaps with a glue
- Wipe away the excess glue with a dry or wet with acetone cloth
- Mechanically fix the joint components by clamping or wrapping
- Follow the curing instructions for the adhesive. Pay attention that there will be no glue spilling from the seam during curing. Spilling can result in forming air pockets and reduced heat transfer.

Mechanical Attachment
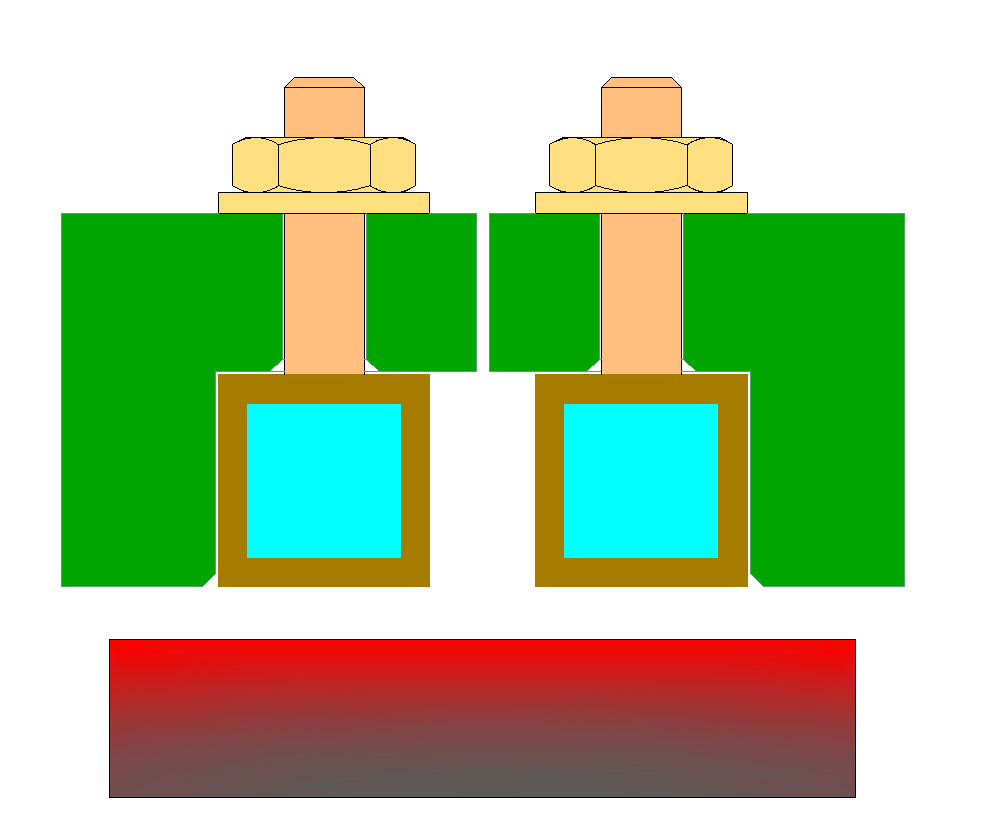
Mechanical attachment of concentrator in combination with a thermally conductive adhesive or paste is the best method. If E-shaped concentrator is broken into two isolated C-shaped sections, no electrical insulation between coil tubing, studs and concentrator is necessary.
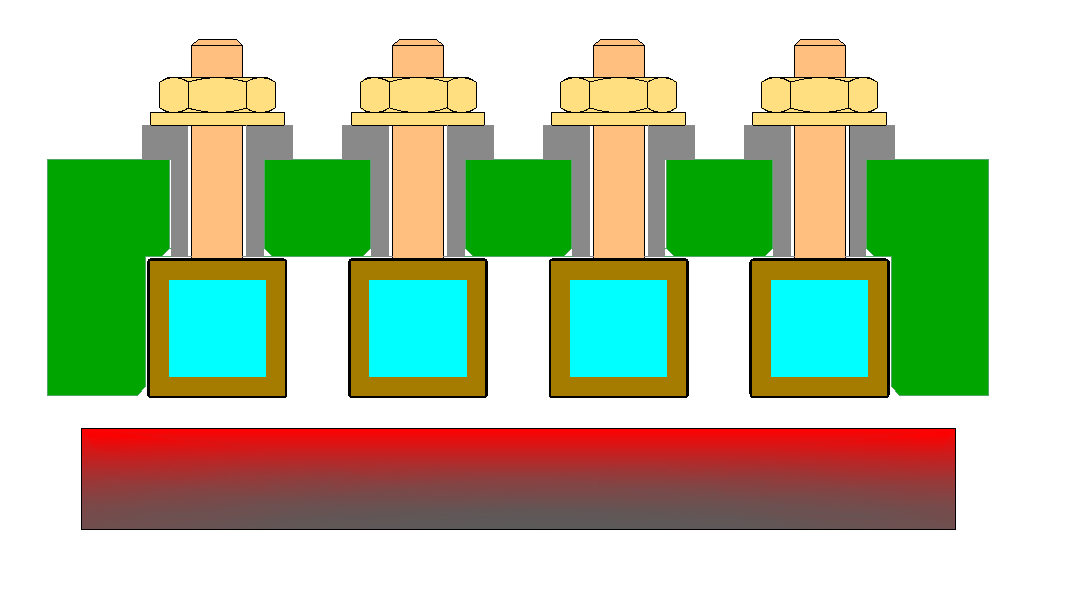
For multi-turn coils it is necessary to insulate concentrator from turns and studs to avoid current leakage through the concentrator which can result in its damage. Thin Nylon coating of turns plus a layer of thermally conductive epoxy can provide sufficient concentrator cooling.
Plastic sleeves and washers may be used for insulation of studs from the concentrator. Though controllers made of Ferrotron 119 or 559H can withstand applied voltage of several hundred volts, electrical insulation is still recommended.
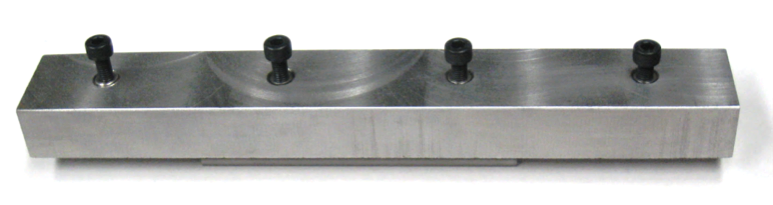
Examples of Multi-turn Coils with Fluxtrol Controllers
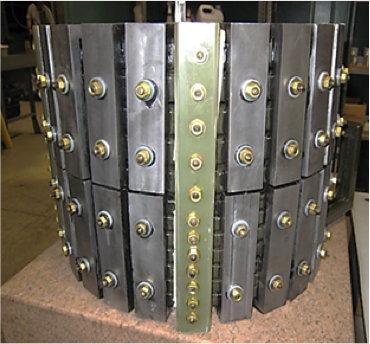
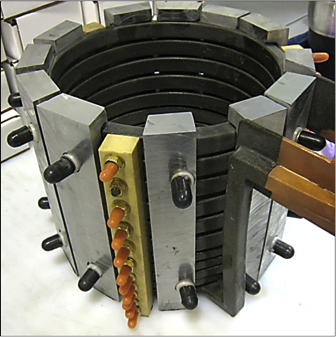

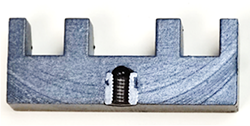
Structural Assembling
There are many cases when Fluxtrol controllers must be attached, not to the coil turns, but to structural components of induction installations such as chamber walls, frames of magnetic shields, etc.
The most reliable method for connection is a bolt joint with use of inserts. Guidelines for installation of threaded inserts:
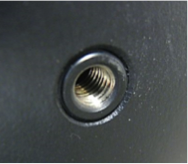
- Use brass or stainless steel inserts of required design and size
- Drill hole of proper depth and diameter
- Install insert; to avoid the insert exit from the hole when unscrewing the bolt, it is recommended to place a drop of adhesive when installing insert.
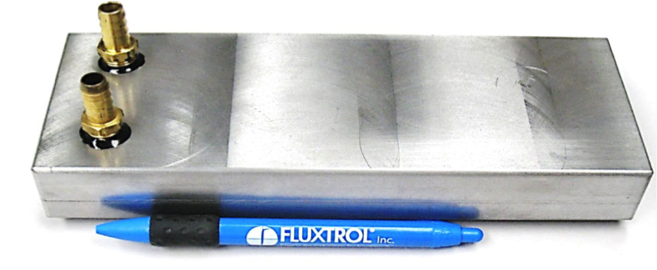
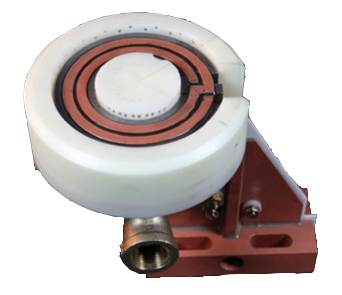
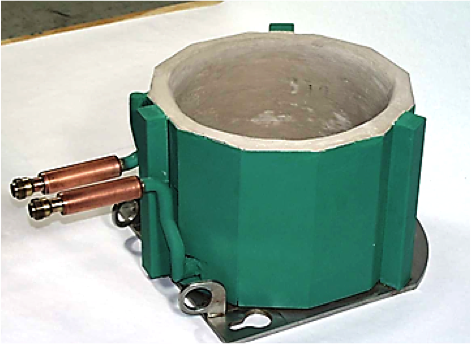
Water-cooled magnetic template
Fluxtrol components are widely used to deliver water or polymer solutions for quenching heated parts. To install fitting, tap a proper thread size directly in Fluxtrol and apply adhesive at installation to lock the fitting.